


Three starting layouts
Choose your tank footprint. These are illustrative starting positions, not flow simulations; check your actual tank and pump instructions.
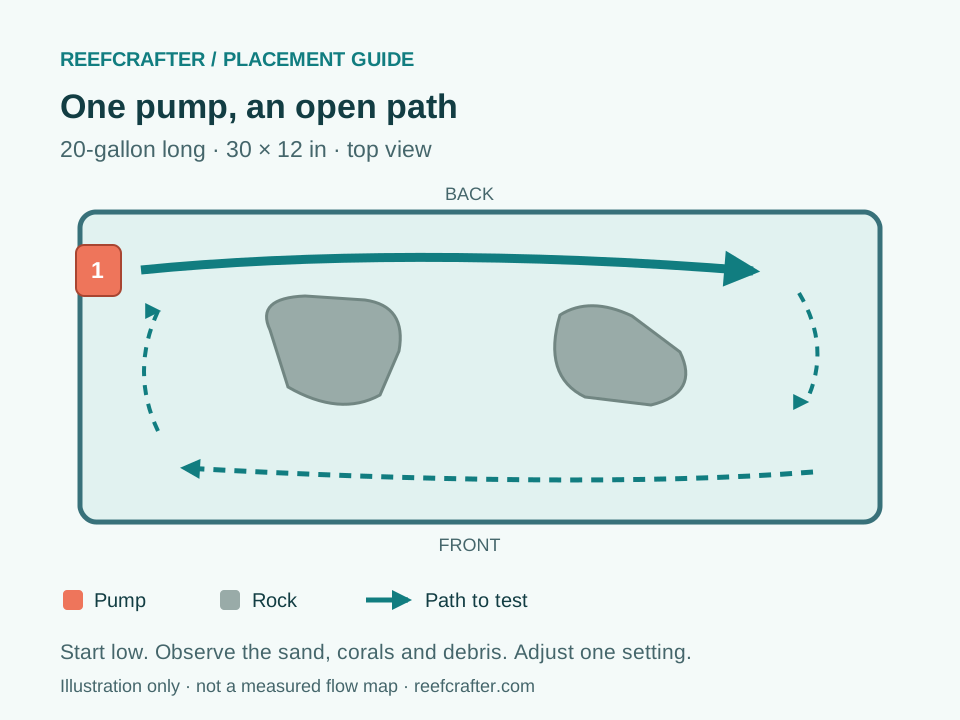
Try one pump first. Check behind the rock and at the far end before adding output.
Open full-size diagram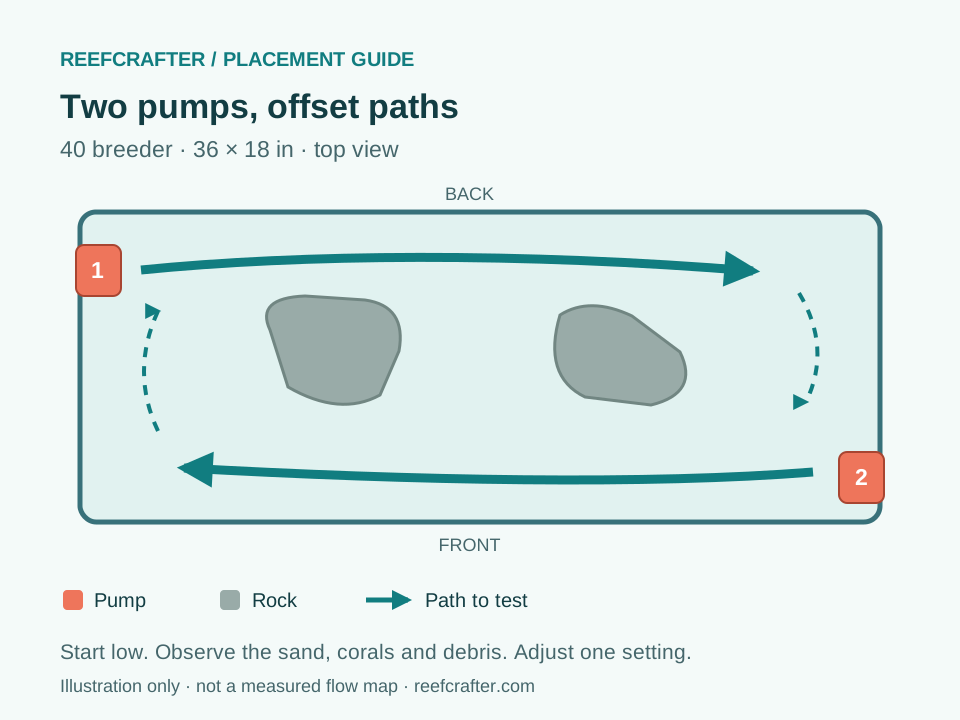
Offset the paths and observe how the two pumps work together.
Open full-size diagram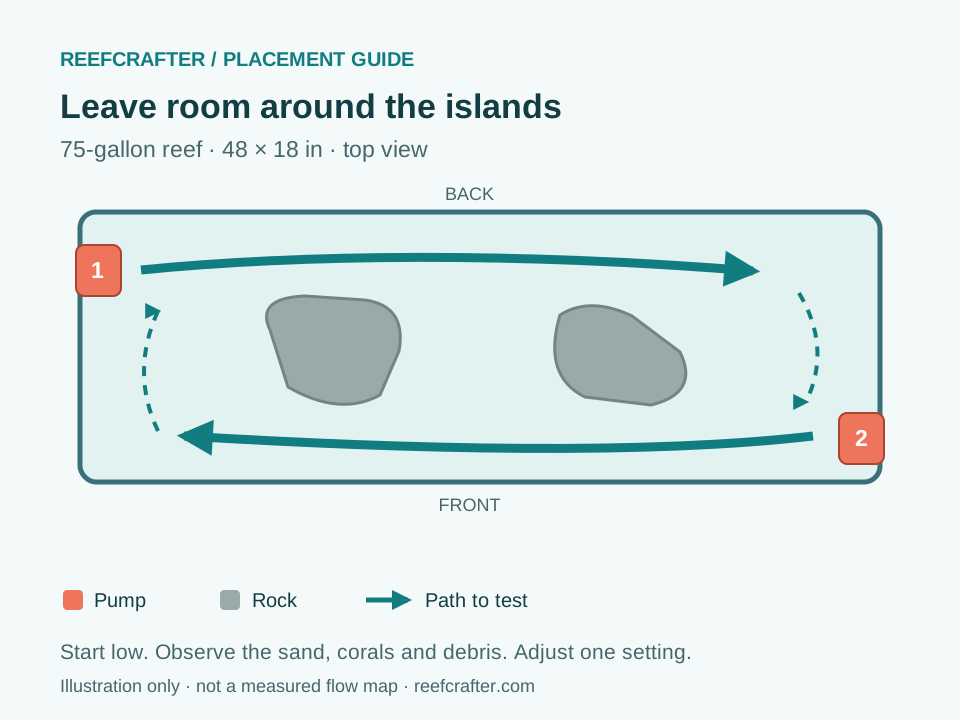
Leave open routes along the longer footprint; look for pockets behind the islands.
Open full-size diagramQuick check
- 1Check the pump manual for glass thickness, mounting clearance and minimum submersion before choosing a position.
- 2Leave an open path in front of the outlet and space around the intake; follow the pump's mounting instructions.
- 3Observe food particles during normal feeding to find circulation paths. Do not add extra food just for a flow test.
- 4Reduce or redirect flow if sand shifts persistently or coral tissue stays pinned in one direction.
Start here: Sketch the rockwork from above and mark where debris collects. Use the diagrams to choose a first position, then compare that sketch with what food particles and coral movement actually show.
Advice for your tank
20-gallon long: begin with one open flow path
For a nominal 30-by-12-inch footprint, try one controllable pump on a short side, aimed along the length through open water. Keep rock away from the outlet and leave a route around the rock for water to return. Check the far end and the space behind the rock at feeding time. If those areas remain still while nearby corals receive too much flow, change the position before turning up the pump.
40 breeder: offset two pumps around the rockwork
For a nominal 36-by-18-inch footprint, start with pumps at opposite ends, one nearer the front and one nearer the back. This is a proposed layout to test, not a measured flow map. Use controllable variation if available; observe both pumps together and through a complete mode cycle. Leave calmer areas for fleshy corals and revisit the layout as colonies grow.
75-gallon reef: reach the far end without a stronger jet
For a nominal 48-by-18-inch footprint, try pumps at opposite ends with open lanes past separate rock islands. If a dense rock wall blocks circulation, reposition a pump or create a gap rather than assuming a higher rated flow will reach behind it. A second lower-output pump can offer a different route, but the result depends on its flow pattern and the aquascape.
What to change when flow looks wrong
Watch several locations, including the sand, behind rocks and near the overflow. Change position, direction or output separately so you can tell which adjustment helped.
- Sand blowing into a bare patch: reduce output or move the flow path higher, within the manufacturer's mounting limits.
- Debris collecting behind a rock: redirect a path around the obstruction and remove accumulated debris during maintenance.
- Coral tissue held flat or pushed against a skeleton: reduce direct flow and reassess; persistent retraction can have causes beyond flow.
- Air being pulled into the pump: check water level and the manual's submersion guidance; do not run a pump with its intake exposed.
Placement is different from pump sizing
The calculator estimates total circulation using ReefCrafter's planning bands. It does not measure current speed at a coral or simulate rockwork. Two pumps with the same rated gallons per hour can distribute water differently. Keep sump return flow separate from this display-circulation check, and use the manufacturer's pump guidance alongside observation.
Calculate the sizing range
Adjust your tank details, then open the result in the planner.
The 20-40x band gives 1,500-3,000 GPH before aquascape and pump placement.
The math and worked examples
Total rated circulation
Example: Two pumps rated at 600 GPH each in a 40-gallon display give 1,200 ÷ 40 = 30× nominal turnover.
This is a sizing example using rated output, not a measurement of actual flow in the aquarium. Lower settings and variable modes change the output.
A planning range
Example: ReefCrafter's mixed-reef planning band gives this range for a 40-gallon display.
Use it to shortlist equipment. It cannot tell you whether a particular coral sits in too much flow or a rock blocks the path.
One adjustment at a time
Example: If the front sand moves but debris sits behind the rock, redirect the path before increasing output.
Record the starting settings and compare the same locations through a full flow cycle. Corals and rockwork determine whether the change is useful.
- Turnover = total powerhead GPH / display gallons
- Soft/LPS often start around 10-30x; mixed 20-40x; SPS 40-60x
- Placement determines whether the same GPH helps or harms coral
Common mistakes
- Copying another tank's percentage setting without matching pump model, footprint and rockwork.
- Aiming a fixed stream directly at a coral to eliminate a distant dead spot.
- Treating arrows in a diagram as a prediction of the tank's real water movement.
- Increasing output to compensate for a dirty pump without checking maintenance first.
Before buying
- Measure the actual footprint and mounting-pane thickness.
- Check minimum output, directional adjustment and supported flow modes.
- Leave room to remove and clean the pump and inspect its intake.
- Check livestock protection requirements; use guards where the manufacturer recommends them.
Common questions
Do I need one wavemaker or two?
One can work in a small, open layout. Consider a second when one pump creates excessive local flow yet leaves another area still. Decide from the observed circulation, not tank volume alone.
Should two pumps face each other?
Opposite sides with offset paths are a useful starting point. Directly opposing streams are another possible arrangement, but neither layout guarantees even circulation around your rockwork.
How high should I mount a wavemaker?
There is no universal distance below the surface. Follow the model's minimum submersion and mounting instructions, avoid drawing air, and choose a height that does not continuously displace the sand.